


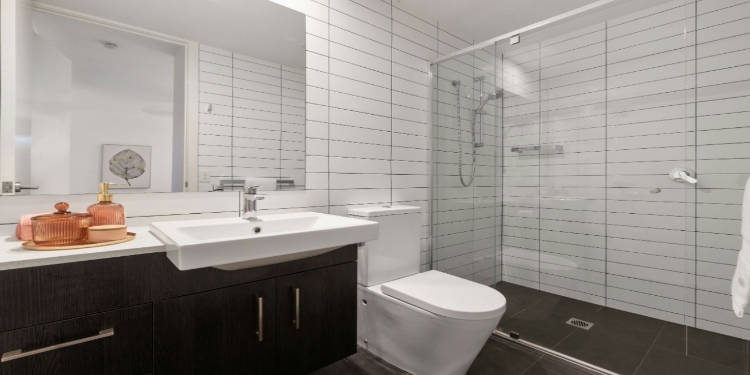
The bathroom floor is one of the most demanding surfaces in the home. It must be waterproof, slip-resistant, easy to clean, and durable enough to withstand years of daily use in a wet environment. At the same time, the bathroom is a room where many homeowners want to create a strong aesthetic statement, making the choice of bathroom floor tiles both a practical and a creative decision. This guide walks through the key considerations for selecting bathroom floor tiles and offers advice on finding the right balance between performance and design.
Why Slip Resistance Is the Most Important Factor
When selecting bathroom floor tiles, slip resistance must be the primary consideration, particularly in households with elderly residents, young children, or people with mobility challenges. Wet bathroom floors are one of the most common causes of slips and falls in the home, and selecting a tile with an inadequate slip rating significantly increases this risk. Look for tiles with a slip-resistance rating of R10 or higher for bathroom floors, with R11 or R12 preferred for walk-in shower areas where the floor will be continuously wet. Matt and textured finishes, as well as smaller tile formats with more grout lines, generally offer better traction than large polished tiles and are the safest choices for bathroom floors.


Waterproofing and Moisture Resistance
All tiles used on a bathroom floor must be impermeable to water, but the tile material alone is not sufficient to make a floor waterproof. The grout joints and the substrate beneath the tiles must also be properly protected. In wet areas such as shower trays and wet rooms, a waterproof tanking system should be applied to the subfloor and up the walls to at least 150mm above finished floor level before tiling begins. Using a waterproof grout and ensuring that all grout joints are filled without voids or cracks is equally important. Even small gaps in the waterproofing layer can allow water to penetrate over time, leading to structural damage and mould growth beneath the tiles.
Best Tile Materials for Bathroom Floors
Porcelain is the most widely recommended material for bathroom floor tiles due to its very low water absorption rate, excellent durability, and wide range of available designs. Ceramic tiles are suitable for bathroom floors in lower traffic areas, but are less dense and more prone to wear than porcelain over time. Natural stone tiles such as slate and limestone bring a premium look to a bathroom floor, but must be sealed regularly to protect against water and staining. Engineered stone tiles offer the visual appeal of natural stone with better consistency and lower maintenance requirements. Small-format tiles, including penny rounds and mosaics, are particularly effective for wet rooms and shower floors, as they follow the floor’s gradient toward the drain without requiring excessive cutting.
Choosing Between Large and Small Format Tiles
The size of the tiles used on a bathroom floor affects both the aesthetic character of the room and the practicality of the installation. Large-format tiles, such as 600mm by 600mm or 800mm by 800mm, create a seamless, contemporary look and make a small bathroom feel more spacious by reducing the number of visible grout lines. However, large tiles require a particularly flat subfloor and are more difficult to use in shower areas where the floor must be graded toward the drain. Smaller tiles, including 100mm by 100mm ceramics and mosaic formats, are more forgiving on uneven subfloors and make it easier to achieve the required drainage gradient in wet areas. They also provide more grout joints, which improve slip resistance underfoot.
Matching Floor and Wall Tiles
Coordinating the floor and wall tiles in a bathroom is one of the most effective ways to create a cohesive and well-considered interior. Using the same tile on both the floor and walls creates a seamless, spa-like effect that feels luxurious and contemporary, though care must be taken to ensure the floor tile is slip-resistant when used in this way. Alternatively, using tiles from the same colour palette or material family but in different formats creates a sense of visual connection without exact repetition. A popular approach is to use a plain, large-format porcelain tile on the walls and a complementary mosaic or smaller tile in the same material on the floor, which ties the scheme together while adding textural variety at floor level.
Planning the Layout and Avoiding Common Mistakes
Planning the tile layout before installation begins is essential for achieving a professional and visually balanced result. Start by establishing the centre point of the room, then work outward in each direction, adjusting the starting position if necessary to ensure that the cut tiles at opposite edges of the room are equal in size. Avoid starting from a wall, as this will result in full tiles at one end and awkwardly small cut pieces at the other. Mark out the layout on the dry floor using chalk lines before applying any adhesive, and dry-lay a section of tiles to check the visual balance before committing. In rooms with complex shapes or multiple doorways, consider preparing a scaled layout drawing to address any issues before the installation day.
David Prior
David Prior is the editor of Today News, responsible for the overall editorial strategy. He is an NCTJ-qualified journalist with over 20 years’ experience, and is also editor of the award-winning hyperlocal news title Altrincham Today. His LinkedIn profile is here.