


















































Recover Deleted Photos for Free in 3 Steps 2026 Guide
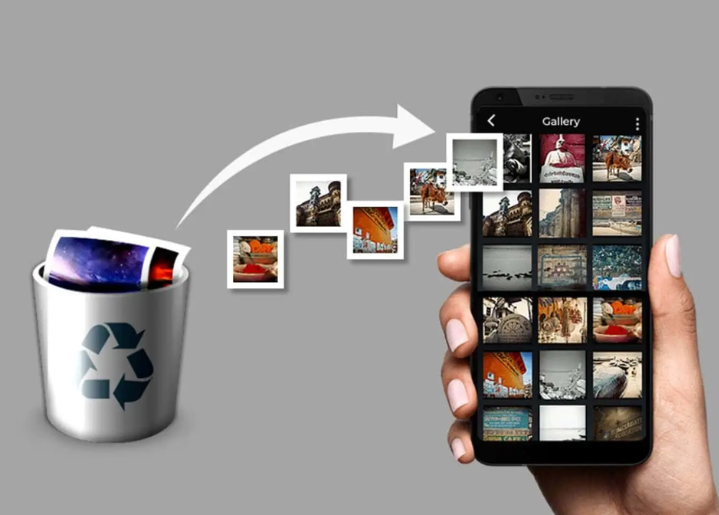
Deleted your photos? Don’t panic. They may not be gone yet. Whether you accidentally emptied the Recycle Bin, your SD card suddenly demands a format, or a transfer went sideways, you may still be able to get your photos back. When you delete a photo, its data usually stays on the drive until new files overwrite it.
That gives a free photo recovery software a window to find and restore it. But the sooner you act, the better. In this guide, we’ll show you how to recover lost photos in 3 simple steps with 4DDiG Data Recovery software: scan, preview, and restore. No command line or recovery lab is needed, and your photos will be back where they belong.


Key Takeaways
- After your photos are permanently deleted, stop using the affected device to avoid overwriting them.
- Check the Recycle Bin or Trash before using a photo recovery software.
- Use 4DDiG Data Recovery to scan, preview, and recover lost photos in 3 steps.
- Recover files to a different drive to prevent further data loss.
- Back up photos in two places to reduce the risk of future loss.
What to Do Immediately After Photos Are Deleted
The first few minutes after photos disappear can make a real difference in whether you can recover them. Before reaching for free photo recovery software, follow these simple steps to protect the missing files and check whether they’re still within easy reach:
Stop Using the Storage Device to Protect Deleted Photos
Taking new pictures, installing apps, downloading files, or even background system updates can write new data to the disk. This potentially overwrites the sectors where your deleted photos are still stored.
If the photos were on an SD card, USB drive, or external hard disk, safely unplug it and set it aside until you’re ready to scan it. But if they were on your internal drive, don’t install recovery software on that same drive. Download it to a different disk or a USB stick instead.
Check the Recycle Bin or Trash First
Before using recovery software, check the obvious place first. Look in the Recycle Bin on Windows or Trash on Mac. Many “lost” photos are still there, especially if you pressed Delete instead of Shift+Delete. This makes Recycle Bin recovery possible.
If they’re missing, they may have been permanently deleted (Shift+Delete or an emptied Bin). They may also have been removed by a cleanup/storage-optimization tool or lost from external media like an SD card or USB drive. But that’s exactly where a photo recovery software can restore permanently deleted photos.
How to Recover Deleted Photos in 3 Steps with 4DDiG
4DDiG Data Recovery is a tool for retrieving files from drives, memory cards, USB devices, and other storage for Windows and Mac users. It can restore 2,000+ file types and recover data lost due to frequent issues like deletion, formatting, corruption, and lost partitions with a high recovery rate.
The main advantage of 4DDiG Free Data Recovery software over many free tools is its 2GB of free, selective file recovery. It also offers preview functionality, broad file support, and a beginner-friendly interface. In fact, the free version is sufficient to restore photos. Here’s how to recover deleted photos :
Step 1: Select the Location Where Photos Were Lost
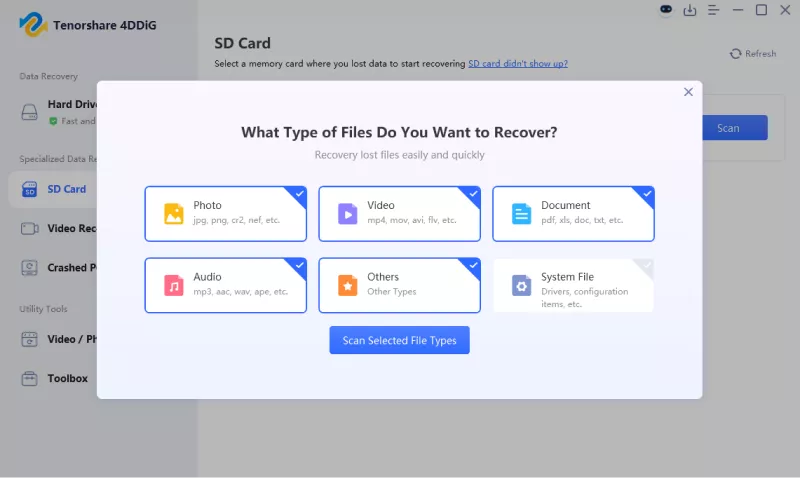
Download and launch 4DDiG Data Recovery Software. Then select the exact location where the photos went missing, such as a local drive/partition, SD card, USB flash drive, external hard disk, or digital camera storage. Scanning the specific source instead of the entire drive is faster and produces cleaner results.
Step 2: Scan for Lost and Deleted Photos
You can set the file type to “Photo” for scanning and leave the other file types. Once the scan starts, 4DDiG Data Recovery searches the selected location for deleted, lost, and existing files. Use the file-type filter to focus on photos. It supports formats including JPG, JPEG, PNG, HEIC, and GIF, plus RAW files such as CR2, CR3, NEF, ARW, ORF, and DNG from most camera brands.
Scan times depend on the drive’s size and condition. A small USB stick may take a couple of minutes, while a large external hard drive with deep scan enabled can take much longer. You can pause or stop the scan anytime, but let it finish before restoring. Stopping early may miss files it hasn’t found yet.
Step 3: Preview and Restore the Photos You Need
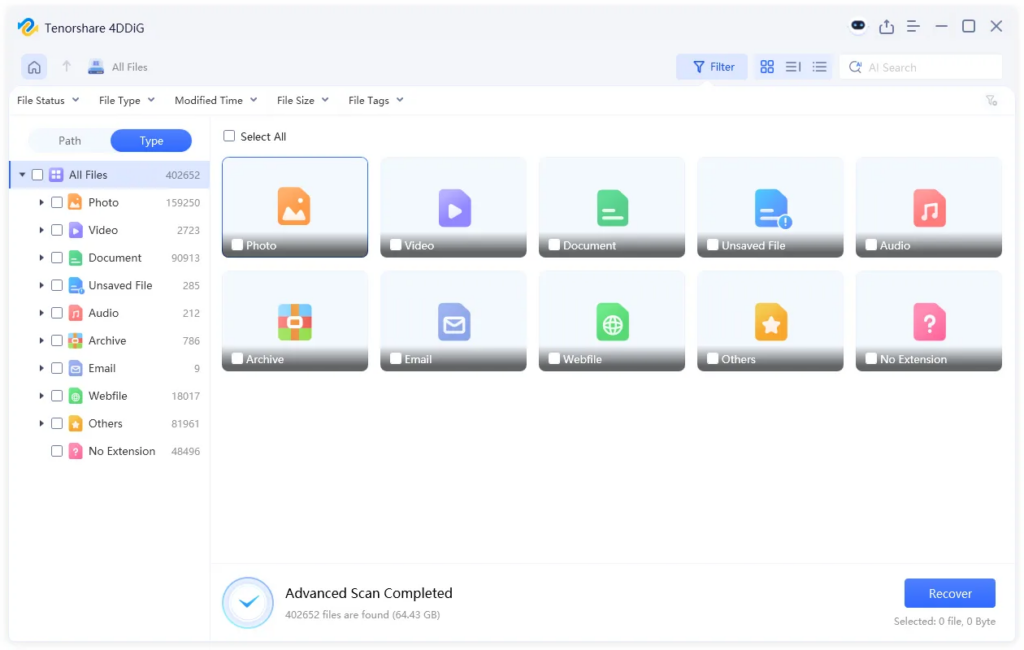
Preview before you recover deleted photos. This confirms you’re getting the right photos, not just files with similar names or thumbnails. You can also modify the tags or input keywords in the search field to filter through results. Select the images you need and save them to a different drive or device than the one scanned. Saving to the same drive can overwrite data you haven’t recovered yet.
| Recovery Stage | What the User Should Do | Key Reminder |
| Before recovery | Stop using the affected drive | Prevent overwritten photos |
| During scanning | Filter results by image type | Find photos faster |
| After scanning | Preview and save elsewhere | Avoid further data loss |
Why 4DDiG Is a Practical Photo Recovery Option
4DDiG Data Recovery supports a range of frequent photo recovery scenarios. Here’s where it fits best, from handling different types of data loss to making recovery easier for beginners:
Recover Photos from Common Data-Loss Situations
Photo loss rarely has one single cause, and 4DDiG Data Recovery is built around that reality. It manages accidental deletion, emptied Recycle Bin or Trash, formatted drives and memory cards, corrupted storage, lost or deleted partitions, and inaccessible or RAW drives.
That covers most everyday photo-loss scenarios, from an accidental format on a camera to a card corrupted mid-write or a drive a computer suddenly can’t read. With that said, results aren’t guaranteed. How much data was overwritten and the physical condition of the storage device determine what’s recoverable. Which is why “stop using the device” isn’t just boilerplate caution.
Make Photo Recovery Easier for Beginners
The appeal of 4DDiG Data Recovery isn’t a deep feature list. It’s the simple select, scan, preview, and recover process, with nothing else required. You don’t need to understand file systems, partition tables, or sector-level recovery. For anyone new to recovery software who just wants their photos back, that simplicity is the real value proposition.
Tips to Prevent Future Photo Loss
A recovery tool is a safety net, not a backup strategy, and there’s no guarantee that you won’t face data loss again in the future. However, you can lessen the chances of it occurring by following a few habits:
- Back Up in Two Places: Back up important photos to both cloud storage and a physical external drive. One copy in one place is really no copy at all.
- Eject Drives Properly: Always eject SD cards and external drives properly rather than pulling them out mid-transfer.
- Format Only After Copying: Copy photos off a camera’s memory card before formatting it for reuse.
- Keep Recovery Software Ready: Keep 4DDiG Data Recovery installed and ready so that if something goes wrong, you’re not scrambling to download and set up software in the moment.
Final Words
Losing photos doesn’t always mean losing them for good. Simply stop using the affected storage and check the Recycle Bin or Trash. If the photos aren’t there and you don’t have a backup, employ a free photo recovery software like 4DDiG Data Recovery. It’s a user-friendly tool that can retrieve them in only 3 simple steps. It supports 2,000+ file types and frequent file-loss scenarios, offers free and selective recovery of up to 2GB, and provides a preview of recovered files.
FAQs
- Can I recover deleted photos from an SD card?
Yes. Connect the SD card to your computer, select it as the scan location in 4DDiG, and run a scan for lost image files. Avoid taking new photos or saving anything else to the card before recovery.
- Can 4DDiG Data Recovery recover photos that are not in the Recycle Bin?
Yes. 4DDiG Data Recovery scans the drive directly. So, it can find photos that were permanently deleted, including ones removed with Shift+Delete or after the Recycle Bin or Trash was emptied.
- How long do I have to recover deleted photos?
There’s no fixed deadline. Deleted photos remain recoverable until new data overwrites the space they occupied, which is why the first move should always be to stop using the affected device, not to rush the recovery itself.
- Is it possible to preview photos before recovering them with 4DDiG?
Yes. 4DDiG Data Recovery lets you preview recoverable images before restoring anything, so you can confirm you’re getting back the correct files rather than recovering blindly.
- Can 4DDiG recover photos from a corrupted or formatted drive?
Yes. It’s built to scan corrupted drives, formatted partitions, and even inaccessible storage devices, looking for recoverable image files in each case.