Introduction
Ball joints are essential components of your vehicle’s suspension system, allowing the steering knuckles to move while maintaining the connection to the control arms. They play a critical role in maintaining smooth steering and a stable ride. Proper installation of ball joints is vital because incorrect alignment or poor installation can lead to premature wear, unsafe handling, or even loss of control while driving. This guide provides a step-by-step process to ensure safe and efficient ball joint installation using a ball joint press.
Tools Required
For this job, you’ll need the following tools:
- Ball joint press with adapters
- Ratchet and socket set
- Torque wrench
- Breaker bar
- Pliers and a hammer
- Safety equipment (gloves, safety glasses)
- Penetrating oil (optional, for rusty components)
When working with these tools, ensure you follow proper safety precautions. Always wear gloves to protect your hands, and safety glasses to shield your eyes from debris. Use a hydraulic jack and jack stands to securely lift and support the vehicle before working underneath it. Ensure that the vehicle is on a level surface to prevent accidental slips or falls.
Preparation Steps
- Lift the Vehicle: Use a hydraulic jack to raise the vehicle and secure it with jack stands. Ensure the vehicle is stable before proceeding.
- Remove the Wheel: Loosen the lug nuts, then remove the wheel to access the suspension components.
- Locate the Ball Joint: Depending on your vehicle, the ball joint is typically located at the lower part of the suspension, near the control arm.
- Loosen Suspension Components: Remove any components obstructing access to the ball joint, such as the sway bar or steering knuckle, using the appropriate wrenches and ratchets.
- Clean the Area: If necessary, apply penetrating oil to help loosen any rusty bolts or nuts.
Safety is paramount during preparation. Double-check that the vehicle is properly supported, and avoid rushing, as improper lifting or removal can lead to injury.
Using the Ball Joint Press
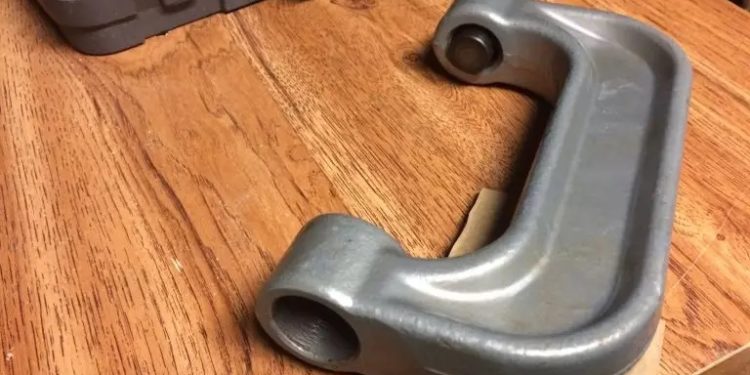
- Positioning the Press: Select the correct adapter for your ball joint press based on your vehicle’s specifications. Position the C-frame press over the ball joint and ensure the receiving cup is correctly aligned under the joint.
- Removing Old Ball Joints: Slowly turn the press screw to push the old ball joint out of its socket. Ensure steady, even pressure to avoid damaging the control arm.
- Inserting the New Ball Joint: Place the new ball joint in the correct orientation and position the press with the proper adapter. Gently press the new joint into place, ensuring it seats fully.
- Check Alignment: While pressing the new joint, periodically stop and ensure that the ball joint is entering the socket straight. Misalignment can lead to uneven wear or improper function.
Following these steps ensures a smooth removal and installation process while avoiding damage to the control arm or surrounding suspension components.
Post-Installation Checks
After installing the new ball joint:
- Reassemble Suspension Components: Reattach any suspension parts, such as the steering knuckle, sway bar, or control arm, removed during the installation process.
- Torque Settings: Use a torque wrench to tighten all bolts and fasteners to the manufacturer’s specified torque settings.
- Inspect the Ball Joint: Ensure that the ball joint is seated properly and securely. Check for any signs of improper installation or gaps between components.
Taking time to perform post-installation checks can prevent future issues and ensure the ball joint functions correctly.
Common Mistakes and How to Avoid Them
- Misalignment: A common mistake is pressing the new ball joint at an incorrect angle, leading to uneven wear or improper function. Always double-check the alignment while pressing.
- Under/Over-Torquing Bolts: Failure to torque suspension bolts properly can cause components to loosen or damage the ball joint. Use a torque wrench and refer to the manufacturer’s specifications.
- Skipping Safety Steps: Avoid rushing the job by skipping critical safety steps, such as ensuring the vehicle is properly supported or wearing protective gear.
Following best practices and paying close attention to detail can help avoid these mistakes, leading to a smooth and successful installation.
Ball Joint Press Tool vs. Bearing Puller Tool
While both the ball joint press and bearing puller tools serve mechanical purposes, they are used for distinct tasks. The ball joint press is designed to remove and install ball joints in a vehicle’s suspension system, using a C-frame and adapters to press the joint in and out of its socket. In contrast, the bearing puller is used for removing bearings from wheel hubs or axles. It uses gripping arms to pull the bearing out, ensuring precision without damaging surrounding components. Both tools are essential but non-interchangeable for their specific jobs.
Conclusion
Installing ball joints with the proper tools, such as a ball joint press, is crucial for vehicle safety and performance. By following this guide, you can ensure a secure, efficient installation that will help maintain proper steering and suspension function. Using a reliable tool like the OMT ball joint press can make the process even smoother, offering precision and durability. Regular vehicle maintenance, including inspecting and replacing ball joints when necessary, can extend the life of your vehicle and prevent costly repairs down the road.


