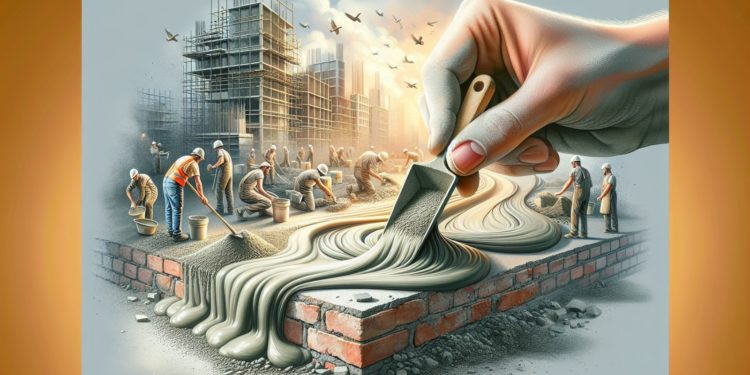
Introduction to Concrete Rendering
Concrete rendering is a popular technique used to enhance the appearance and durability of concrete surfaces. Whether you’re working on a residential or commercial project, achieving a perfect concrete rendering finish is essential for both aesthetic appeal and long-term performance. In this comprehensive guide, we’ll explore the key steps and techniques involved in creating a flawless concrete rendering finish.
Understanding the Basics of Concrete Rendering
Before diving into the specifics of achieving a perfect finish, it’s important to understand the basics of concrete rendering. Concrete rendering involves applying a thin layer of cement-based material over an existing concrete surface to create a smooth, uniform, and visually appealing finish. This process can be used to hide imperfections, improve the overall appearance, and protect the underlying concrete from damage.
Preparing the Concrete Surface for Rendering
Cleaning and Repairing the Surface
The first step in achieving a perfect concrete rendering finish is to properly prepare the surface. Begin by thoroughly cleaning the concrete, removing any dirt, debris, or loose material. If there are any cracks, holes, or other imperfections, repair them using a suitable concrete patching compound. Allow the repairs to dry completely before proceeding.
Applying a Bonding Agent
To ensure proper adhesion between the existing concrete and the rendering material, it’s essential to apply a bonding agent. A bonding agent is a specialized liquid that helps the rendering material adhere to the concrete surface. Apply the bonding agent evenly using a brush or roller, following the manufacturer’s instructions for application and drying time. While rendering focuses on surface finishes, structural elements like concrete rings also play a key role in many construction projects behind the scenes.
Selecting the Right Rendering Material
Types of Rendering Materials
There are various types of rendering materials available, each with its own unique properties and benefits. Some common options include cement-based renders, acrylic renders, and lime-based renders. Consider factors such as the desired finish, environmental conditions, and the specific requirements of your project when selecting the appropriate rendering material.
Mixing and Preparing the Rendering Material
Once you’ve chosen the rendering material, it’s time to mix and prepare it according to the manufacturer’s instructions. Pay close attention to the recommended water-to-cement ratio and any additives that may be required. Thoroughly mix the rendering material using a mechanical mixer or a drill with a mixing attachment until it reaches a smooth and consistent consistency.
Applying the Rendering Material
Techniques for Applying the Rendering
There are several techniques for applying the rendering material, depending on the desired finish and the size of the area being rendered. Some common methods include hand troweling, spray application, and using a rendering machine. Each technique requires a different set of tools and skills, so it’s important to familiarize yourself with the appropriate method for your project.
Achieving an Even and Consistent Thickness
To ensure a perfect finish, it’s crucial to apply the rendering material evenly and consistently across the entire surface. Use a straight edge or a rendering rule to maintain a uniform thickness throughout the application process. Aim for a thickness of approximately 10-15mm, depending on the specific requirements of your project.
Texturing and Finishing Techniques
Once the rendering material has been applied, you can create various textures and finishes to enhance the visual appeal of the surface. Some popular techniques include float finishing, sponge finishing, and stipple finishing. Experiment with different tools and techniques to achieve the desired texture and finish for your project.
Curing and Protecting the Rendered Surface
Importance of Proper Curing
Proper curing is essential for achieving a strong, durable, and long-lasting concrete rendering finish. Curing involves keeping the rendered surface moist for a specified period, typically several days, to allow the cement to hydrate and develop its full strength. Failure to properly cure the rendering can result in cracking, dusting, and reduced durability.
Methods for Curing the Rendered Surface
There are several methods for curing a rendered surface, depending on the environmental conditions and the size of the area. Some common techniques include mist spraying, covering the surface with plastic sheeting, and applying a curing compound. Choose the most appropriate method for your project and follow the recommended curing duration to ensure optimal results.
Protecting the Rendered Surface from Damage
In addition to proper curing, it’s important to protect the rendered surface from damage during and after the curing process. Avoid walking on or applying any pressure to the surface until it has fully cured. If the rendered surface is exposed to harsh weather conditions or potential impact damage, consider applying a protective sealer or coating to enhance its durability and resistance.
Common Mistakes to Avoid in Concrete Rendering
Improper Surface Preparation
One of the most common mistakes in concrete rendering is failing to properly prepare the surface before applying the rendering material. Skipping the cleaning, repairing, or bonding agent application steps can lead to poor adhesion, cracking, and premature failure of the rendering. Always take the time to thoroughly prepare the surface to ensure a long-lasting and high-quality finish.
Inconsistent Mixing and Application
Inconsistent mixing and application of the rendering material can result in an uneven finish, variations in color, and reduced durability. Make sure to carefully follow the manufacturer’s instructions for mixing and maintain a consistent technique throughout the application process. Use the appropriate tools and equipment to ensure a uniform and professional-looking finish.
Insufficient Curing and Protection
Neglecting to properly cure and protect the rendered surface can have detrimental effects on its long-term performance. Inadequate curing can lead to cracking, dusting, and reduced strength, while lack of protection can leave the surface vulnerable to damage from impact, moisture, and other environmental factors. Always prioritize proper curing and protection to ensure the longevity and integrity of your concrete rendering project.
Maintenance and Repair of Rendered Surfaces
Regular Cleaning and Inspection
To keep your rendered surfaces looking their best and to extend their lifespan, regular cleaning and inspection are essential. Periodically wash the surface using a mild detergent solution and a soft-bristled brush to remove dirt, stains, and debris. Inspect the surface for any signs of damage, such as cracks or chips, and address them promptly to prevent further deterioration.
Repairing Damaged Areas
If you notice any damaged areas on your rendered surface, it’s important to repair them as soon as possible to prevent the problem from worsening. For minor cracks and chips, use a suitable patching compound and follow the manufacturer’s instructions for application and curing. For more extensive damage, it may be necessary to remove the affected area and re-render it to maintain a seamless and consistent finish.
Resealing and Recoating
Over time, the protective sealer or coating applied to your rendered surface may begin to wear off, leaving the surface vulnerable to damage and staining. To maintain optimal protection and appearance, periodically reseal or recoat the surface using a compatible product. Follow the manufacturer’s recommendations for application frequency and technique to ensure the best results.
Conclusion
Achieving a perfect concrete rendering finish requires careful planning, attention to detail, and the use of proper techniques and materials. By following the steps outlined in this comprehensive guide, you can create a stunning and durable rendered surface that will enhance the beauty and value of your property for years to come. Remember to prioritize surface preparation, select the right rendering material, apply it consistently, and ensure proper curing and protection for the best possible results.
Frequently Asked Questions (FAQs)
1. How long does it take for a rendered surface to fully cure?
The curing time for a rendered surface can vary depending on the specific material used and the environmental conditions. In general, it takes approximately 24-48 hours for the surface to become touch-dry, and 7-28 days for it to fully cure and develop its maximum strength. Always refer to the manufacturer’s instructions for the recommended curing time.
2. Can I apply concrete rendering over painted surfaces?
While it is possible to apply concrete rendering over painted surfaces, it is not recommended. The paint can act as a barrier between the rendering material and the underlying concrete, preventing proper adhesion and leading to premature failure. For best results, remove any existing paint and properly prepare the concrete surface before applying the rendering material.
3. How often should I reseal my rendered surface?
The frequency of resealing your rendered surface depends on various factors, such as the type of sealer used, the environmental conditions, and the level of foot traffic. As a general guideline, it’s recommended to reseal your rendered surface every 2-5 years to maintain optimal protection and appearance. However, always follow the manufacturer’s recommendations for the specific sealer you are using.
4. Can I apply concrete rendering in cold or wet weather conditions?
Applying concrete rendering in cold or wet weather conditions can be challenging and may result in slower curing times, reduced adhesion, and potential cracking. It’s generally recommended to avoid rendering in temperatures below 5°C (41°F) or during rainy or humid conditions. If rendering in these conditions is unavoidable, take appropriate measures such as using accelerators, covering the surface, and allowing for extended curing times.


