


![5 Best CFD Brokers for Beginners [UK, 2026]](https://todaynews.co.uk/wp-content/uploads/2026/03/Invest-360x180.jpg)


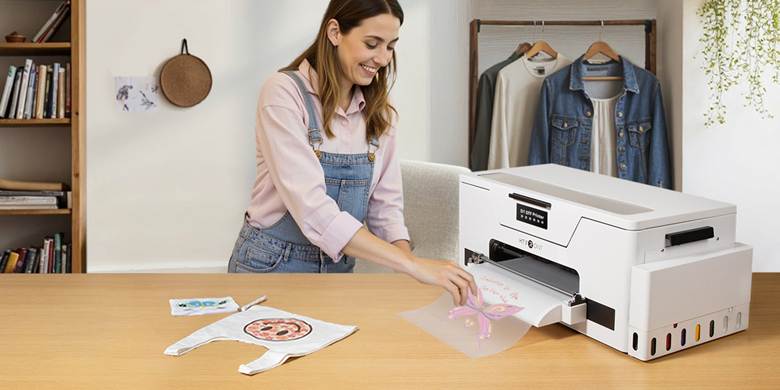
Direct-to-Film (DTF) printing is revolutionizing the custom apparel industry. With its ability to produce vibrant, durable prints on a wide variety of fabrics, DTF technology is quickly becoming the go-to choice for small businesses and creative entrepreneurs. If you’re new to DTF or considering upgrading your workflow, this step-by-step guide will walk you through the entire process—from preparing your artwork to finishing your shirt with a heat press for shirts. We’ll also highlight why choosing the best dtf printer for small business can make a big difference in your results.
Step 1: Prepare Your Design
Start by creating or selecting your artwork. DTF printers handle complex, multi-color designs with ease, so you can be creative!


- File Format: Use high-resolution PNG or TIFF files with transparent backgrounds for best results.
- Design Tips: Make sure your colors are vibrant and your lines are crisp. DTF is perfect for detailed graphics, gradients, and photographs.
Step 2: Print onto DTF Film
With your design ready, it’s time to print using your DTF printer. If you’re running a small business, investing in the best dtf printer for small business will ensure reliable operation and consistent quality.
- Load the Film: Place PET DTF film into your printer, shiny side up.
- Ink Setup: DTF printers use special CMYK and white inks. The white layer is crucial for opacity, especially on dark fabrics.
- Printing: Send your design to the printer. The printer will lay down the color layer first, followed by the white ink layer.
Step 3: Apply Adhesive Powder
Immediately after printing (while the ink is still wet), apply DTF adhesive powder:
- Sprinkle Evenly: Cover the printed area with the powder, ensuring all ink is coated.
- Shake Off Excess: Gently shake the film to remove any extra powder, leaving only what sticks to the ink.
Step 4: Cure the Film
The adhesive powder must be cured to bond it to the ink:
- Curing Methods: Use a curing oven, a dedicated DTF curing machine, or a heat press for shirts set to hover mode (not pressing down) to melt the powder.
- Temperature & Time: Typically, cure at 160-170°C (320-338°F) for 2-3 minutes. The powder should melt and become clear.
Step 5: Position the Film on the Garment
Once cured, the DTF film is ready to be transferred:
- Pre-Press the Garment: Use your heat press to remove wrinkles and moisture from the shirt.
- Align the Design: Place the cured film, printed side down, onto the shirt in your desired position.
Step 6: Transfer with a Heat Press for Shirts
This step is crucial for a professional finish.
- Settings:
- Temperature: 160-170°C (320-338°F)
- Time: 15-20 seconds
- Pressure: Medium to firm
- Press: Close the heat press and apply heat and pressure to transfer the design from the film to the fabric.
Step 7: Peel the Film
After pressing, allow the shirt and film to cool for a few seconds.
- Cool Peel: Carefully peel away the PET film. The design should remain on the shirt, vibrant and well-adhered.
Step 8: Post-Press (Optional)
For extra durability and a softer feel:
- Post-Press: Place a piece of parchment or Teflon sheet over the design and press again for 5-10 seconds.
Tips for Success
- Use Quality Materials: The best dtf printer for small business will deliver consistent results, but always use high-quality inks, films, and powders.
- Test Your Settings: Different fabrics may require slight adjustments in temperature, pressure, or time.
- Maintenance Matters: Regularly clean your printer and heat press for optimal performance.
- Expand Your Offerings: DTF printing works on cotton, polyester, blends, and more—experiment with bags, hats, and other products.
Why Choose DTF Printing for Your Small Business?
DTF printing offers several advantages for small businesses:
- Versatility: Print on nearly any fabric or color.
- Low Setup Cost: No need for screens or expensive setup.
- Speed: Quick turnaround for custom orders.
- Quality: Vibrant, durable prints that withstand washing and wear.
Selecting the best dtf printer for small business ensures your workflow is efficient and your products consistently impress your customers. Pairing it with a reliable heat press for shirts completes a professional setup that can handle high-volume orders and intricate designs.
Troubleshooting Common Issues
- Poor Adhesion: Check curing temperature and time, and ensure the powder is evenly applied.
- Faded Colors: Use recommended inks and films; check printer settings.
- Film Not Peeling Cleanly: Allow the design to cool before peeling; adjust press pressure if needed.
Conclusion
DTF printing is a powerful, flexible solution for custom apparel. By following these steps and investing in the best dtf printer for small business and a quality heat press for shirts, you’ll be able to produce stunning, long-lasting designs on a variety of garments. Whether you’re launching a business or expanding your creative toolkit, mastering DTF printing opens up endless possibilities for personalized products.