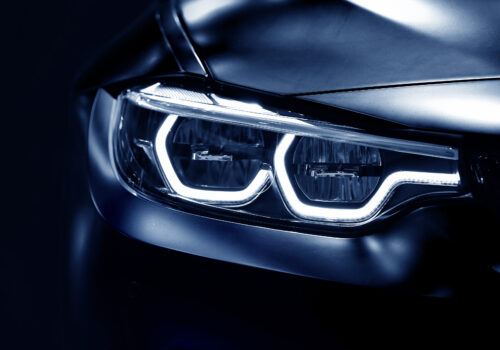
Clear headlights can mean safety as well as beauty. Headlights can not avoid being constantly getting cloudy, blocking your range of vision and making the car look far older than it is. This is the reason why a headlight restoration kit is so simple, effective, and economical for restoring headlights. This extensive review will walk you through everything you need to know about these kits so that you can make the right choice for your vehicle.
Understanding Headlight Degradation
The headlight degradation is caused by many factors related to the environment. This main culprit of it all can be UV rays from the sun, which start an oxidation process. Over some time, dirt, debris, and micro-scratch causes from regular use bring a further deterioration in condition, making the headlight foggy, yellowed, thereby compromising safety while driving in night conditions and reducing general look and resale value.
The good news is there is a headlight restoration kit offered that can reverse the appearance of damage once more-perfectly clear and wonderfully functional.
What’s Inside a Headlight Restoration Kit?
Most headlight restoration kits contain everything you may need to address the problem. Common components include:
- Sandpaper/Abrasive Pads: These are available in different grits to take off the oxidation, feathering it out to a smooth surface.
- Polishing Compounds: Formulated creams or liquids used specially to restore clarity.
- UV Sealants: This will protect the restored headlight from future oxidation.
- Microfiber Cloths: Great to apply and buff products with.
- Application Tools: Some come even with an attachment of drill or sponges to make easy applications possible.
While premium kits could afford additional tools or components of higher quality, the results from even the more basic kits can be first-rate if used properly.
Headlight Restoration Kit: Instructions in Steps
Restoring your headlights is pretty straightforward. Here’s how to achieve professional-level results:
Preparation:
- Clean the headlights very well to remove all the dirt and grime.
- Mask off the surrounding areas with painter’s tape to protect your car’s paint.
Sanding:
- Use the provided sandpaper, starting with a coarse grit and working your way to finer grits.
- Keep the surface wet while sanding to avoid scratching.
Polishing:
- Start spreading the polishing compound on top of the headlight face.
- Then, buff it using circular motions until the clarity improves a great deal.
Sealing:
- Seal it off with a UV protectant to help prevent further oxidation.
- Allow it to dry out completely prior to driving your car.
Advantages of Using a HeadLight Restoration Kit
- Save Money: Going to the professionals could set you back quite a bit of money, not to mention how much it would cost to replace the entire headlight. You get to restore these at a much cheaper price.
- Convenience: You can do the restoration step by step and at your own convenience without necessarily having to set an appointment.
- Safety: This promotes safe driving by allowing a clearer view of the road, thereby reducing the risk of accidents caused by driving in darkness or inclement weather conditions.
- Aesthetic: Clear headlights make a car look better and seem to be better maintained.
How to Choose the Right Headlight Restoration Kit
Headlight restoration kits are not all equal, however. Here are things that you might want to take note of:
- Compatibility: Make sure that the kit provided is designed for the type of your headlights, whether polycarbonate or glass.
- Ease of Use: If you are a beginner with DIY projects, then look for kits that say they are for beginners.
- Reviews and Ratings: Go through customer reviews about effectiveness and ease of use.
- UV Protectant: Kits have UV sealants that work for an extended period of time.
While there are many brands, some have proved to be more reliable and efficient. Compare features such as eco-friendliness, durability, and included tools to make an informed decision.
Common Mistakes to Avoid
To be successful, avoid these common pitfalls:
- Over-Sanding: Too much sanding will permanently damage the headlights. Follow the instructions and start with the recommended grit.
- Avoidance of UV Protection: This step is very important for sustaining the restoration results.
- Poor Smoothening: Failure to clean the headlight properly before starting may yield poor, uneven results.
- Safety Precautions: Work in a well-ventilated area and always wear gloves when dealing with chemicals.
- Wrong Choice of Kit: These need to suit the material as well as the condition of the headlight.
Maintaining Your Refurbished Headlights
After the effort of restoration, maintaining your headlights will keep them looking and functioning clearly:
- Regular Cleaning: Mild cleaners are used to avoid any occurrence of dirt and grime accumulation.
- UV Protectant Application: Apply a UV sealant every few months to extend the longevity of the restoration.
- Avoid using harsh chemicals, as some cleaners may burn the protective coating.
- Protect from the Elements: Car covers or parking in shaded areas can reduce exposure to UV rays and environmental damage.
Frequently Asked Questions (FAQs)
- How long does one expect results from the headlight restoration kit to last? Results actually depend on the quality and your maintenance of the lights. Usually, results from proper care can last any time between 6 months up to 2 years.
- The headlight restoration kit won’t fix any cracks or deep scratches. These kits work, but they’re really limited to surface-level problems in the oxidation and clouding of your headlights. Probably for more serious conditions-for instance, cracks or deep scratches-you would need a professional either to repair or replace your headlights.
- Are all headlight restoration kits safe to use on any kind of headlights? Most of the kits are safe to be used on polycarbonate headlights, which again are the most common types. Yet, one should always go through the product description for compatibility.
- How often is headlight restoration needed? It is usually done when the first signs of cloudiness or less clarity in the lights appear, which could easily be prevented with proper, timely maintenance.
- When Restoration Does Not Improve Clarity: If the kit doesn’t provide decent results, then maybe it is time to get professional help or replace the headlights altogether.
Why You Should Invest in a Headlight Restoration Kit
In essence, any owner should have a headlight restoration kit in his/her arsenal. It is pretty convenient and cost-effective towards securing and enhancing your vehicle on road and view. You might obtain professional results on your own provided you choose properly and do the steps exactly. Further maintenance will go to keeping clarity restored with the certainty that your new-looking headlights will serve several years into the future, free of haziness problems. For more info please visit hzcarcare.co.uk
Clear headlights are good to look at and safe. Get a headlight restoration kit today and experience the difference.


