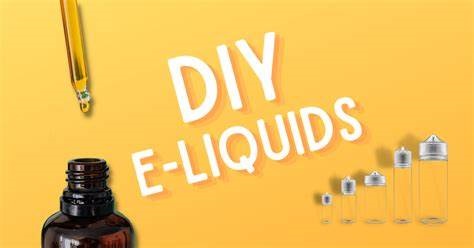
Vaping has become a popular alternative to smoking, offering a customizable experience that can be tailored to individual tastes. One of the most exciting aspects of vaping is the ability to create your e-liquids, known as DIY e-liquids. This guide will walk you through the process of making your vape juice, highlight the benefits, and explore the best Lost Mary flavors available.
Why Choose DIY E-Liquid?
DIY e-liquid offers several advantages over pre-made options. Here are some key reasons why you might consider making your vape juice:
Cost Savings
One of the most significant benefits of DIY e-liquid is the cost savings. Pre-made e-liquids can be expensive, especially if you vape regularly. By making your own, you can save a substantial amount of money in the long run.
Customization
DIY e-liquid allows for complete customization. You can experiment with different flavors, nicotine levels, and VG/PG ratios to create a vape juice that perfectly suits your preferences.
Control Over Ingredients
When you make your e-liquid, you have full control over the ingredients. This is particularly important for those who have sensitivities or allergies to certain components commonly found in commercial e-liquids.
Fun and Rewarding
The process of creating your vape juice can be a fun and rewarding hobby. It’s a creative outlet that allows you to experiment and fine-tune your recipes.
Getting Started with DIY E-Liquid
Before you start making your e-liquid, there are a few essential supplies you’ll need:
Ingredients
Propylene Glycol (PG): A common base ingredient in e-liquid, known for carrying flavor well.
Vegetable Glycerin (VG): Another base ingredient that produces thicker vapor clouds.
Nicotine: Optional, depending on your preference.
Flavour Concentrates The key to creating unique and delicious vape juice.
Equipment
Syringes and Pipettes: For accurately measuring and mixing ingredients.
Bottles: To store your finished e-liquid.
Gloves: To protect your hands while handling nicotine and other ingredients.
Labels: To keep track of your different creations.
How to Make DIY E-Liquid
Making your e-liquid is a straightforward process that involves mixing the base ingredients with flavor concentrates. Here’s a step-by-step guide:
Step 1: Determine Your Recipe
Decide on the flavors you want to use and the desired nicotine strength. Many online calculators and forums can help you formulate a recipe.
Step 2: Measure Your Ingredients
Using syringes or pipettes, measure out the appropriate amounts of PG, VG, nicotine, and flavor concentrates. Accuracy is crucial, especially when handling nicotine.
Step 3: Mix Your Ingredients
Combine all the ingredients in a clean bottle. Shake the mixture thoroughly to ensure that everything is well-blended.
Step 4: Steep Your E-Liquid
Steeping allows the flavors to meld together and develop fully. Some vapers prefer to steep their e-liquid for a few days to several weeks, depending on the recipe.
Step 5: Test and Adjust
After steeping, test your e-liquid. You may need to make adjustments to the flavor or nicotine level to achieve the perfect vape juice.
Best Lost Mary Flavours for DIY E-Liquid
Lost Mary is known for its high-quality flavor concentrates, making it a popular choice for DIY e-liquid enthusiasts. Here are some of the best Lost Mary flavors to consider:
1. Blueberry Bliss
A sweet and tangy blueberry flavor that’s perfect for fruit lovers. It’s a versatile concentrate that can be used on its own or mixed with other fruit flavors.
2. Vanilla Custard
A rich and creamy custard flavor with a hint of vanilla. This concentrate is ideal for those who enjoy dessert-flavoured vape juice.
3. Mango Tango
A tropical mango flavor that’s both sweet and slightly tart. It’s a great choice for creating a refreshing and exotic vape juice.
4. Strawberry Delight
A classic strawberry flavor that’s juicy and sweet. It pairs well with other fruit or dessert flavors.
5. Tobacco Royale
For those who prefer a more traditional vape experience, Tobacco Royale offers a smooth and robust tobacco flavor with a hint of sweetness.
Tips for Perfecting Your DIY E-Liquid
Creating the perfect vape juice takes time and experimentation. Here are some tips to help you along the way:
Start with Simple Recipes
If you’re new to DIY e-liquid, start with simple recipes that use one or two flavors. This will help you understand how different concentrates interact with each other.
Keep Detailed Notes
Record your recipes, including the exact measurements and steeping times. This will make it easier to replicate successful batches and troubleshoot any issues.
Use Quality Ingredients
Invest in high-quality PG, VG, nicotine, and flavor concentrates. The quality of your ingredients will directly impact the taste and performance of your e-liquid.
Experiment with Ratios
Don’t be afraid to experiment with different VG/PG ratios. Higher VG ratios produce thicker vapor, while higher PG ratios enhance flavor intensity.
Patience is Key
Steeping is an essential part of the DIY e-liquid process. Be patient and give your vape juice time to develop its full flavor profile.
Conclusion
DIY e-liquid offers a world of possibilities for vapers looking to customize their experience. By understanding the basics of e-liquid ingredients and the process of mixing, you can create vape juice that perfectly suits your taste. The best Lost Mary flavors provide an excellent starting point, offering high-quality concentrates that can be used to craft a wide range of delicious e-liquids. Whether you’re a beginner or an experienced DIYer, this guide provides the knowledge you need to start making your e-liquid and enjoying the many benefits it offers.


