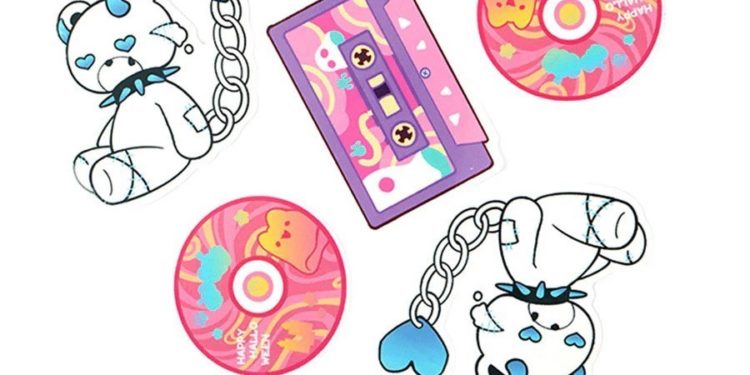
Well, be it your laptop or a car, custom vinyl stickers surely make one look extremely impressive with their personalization. Without tearing, trying to remove them is tricky, right? Don’t sweat about it! Using proper methods and being patient will safely remove the custom vinyl stickers from your device.
Why It Is Important to Remove Stickers Carefully
Vinyl stickers stick very firmly and are made to last, but removing them incorrectly can damage the surface they are on by leaving sticky or visible residue. Whether it be in a glass window, painted wall, or even on top of furniture, taking care during removal means your items will remain in great condition.
Careful removal of stickers saves one from frustration, too. A quick pull may be very tempting, but it is worth taking the pain to do it the right way to avoid scratches or marks that are not needed. Let’s dive into the best practices and tools for hassle-free removal.
Materials You Might Need
Before starting, gather these items:
- Hairdryer or heat gun
- Plastic scraper or old credit card
- Rubbing alcohol or adhesive remover
- Soapy warm water
- Soft cloth
- Razor blade [for glass only]
- Microfiber towel
- Vinegar (optional for removing film or residue)
These will also make the process a great deal easier and safer for most surfaces.
How to Remove Custom Vinyl Stickers in Steps
1. Apply Heat to Loosen the Adhesive
Heat is your best friend when it comes to removing vinyl stickers. Here’s how:
- Plug in a hair dryer into an outlet and turn the dryer to a medium or high setting.
- Hold the hair dryer a few inches away, moving it around to heat the surface.
- This will allow the adhesive to soften in about 30 seconds and make the sticker easy to remove.
Be careful with temperature-sensitive surfaces like plastic and avoid overheating, you might want to consider working with it on the lowest possible option once you have a heat gun.
2. Peel Off the Sticker
Carefully, when the adhesive is warm, pry the edge of the sticker up with a finger or a plastic scraper.
- Start in one corner and peel slowly. This will help prevent the tearing of the sticker.
- Keep pulling in a low direction to avoid residue that may be left by the adhesive.
- If the sticker is stubborn, hit it with heat again and try once more.
A steady approach is key. If the sticker tears, don’t worry. Simply heat the next section and continue peeling.
3. Wipe down residue
Sometimes, some sticky residue may remain after peeling. Here’s how to remove it:
- Dampen a soft cloth with either rubbing alcohol or an adhesive remover.
- Gently rub until the residue dissolves.
- Allow the solution to sit on tough spots for a minute or so before wiping.
Alternatively, you may use a mixture of warm water and vinegar. Dip a cloth into the solution and wipe away the residue. Avoid using abrasive cleaners that could scratch the surface.
4. Wash and Dry the Surface
Clean the surface, once the sticker and residue are removed:
- Clean with a damp cloth using warm soapy water.
- Dry with a microfiber towel to prevent water spots.
- A clean finish means the surface is ready for reuse or new decorations.
Tips for Different Surfaces
Glass
Custom vinyl stickers on glass are pretty easy to remove with some heat and a razor blade. Use the blade at a shallow angle to avoid scratching. Always pair the blade with water or a lubricant like soapy water to protect the surface.
Metal
Metal surfaces are hard yet scratch easily. Stay with plastic tools and adhesive removers. If the sticker is large, heat the area in sections for better control.
Painted Walls
Be more careful with painted walls: first test the adhesive in some inconspicuous small areas to make certain it will not damage the paint; use low heat with a hair dryer and avoid hard scrubbing.
Plastic
Plastic could melt due to excessive heat, so keeping the setting to low using a hair dryer and also softly scraping the area can already help. It must be noted that extreme chemicals that discolor a surface should also be avoided.
Wood
Wood surfaces should be treated with care. Heat and a plastic scraper work well, but be careful not to use too much moisture, which can warp the wood. For residue, a small amount of oil-based cleaner works well.
Avoid These Common Mistakes
- Handling with Sharp Tools: Metal blades scratch surfaces. Avoid using them. Instead, use plastic tools.
- Skipping the Heat: Stickers may tear without heat, or leave a residue.
- Pulling off too quickly: Peeling slowly and steadily reduces the possibility of damage.
- Caustic Chemicals: The usage of certain types of solvents may discolor or damage fragile surfaces. Always test in an inconspicuous area.
Why Custom Vinyl Stickers are Easy to Remove
Custom vinyl stickers feature high-end material treatments that stick perfectly at application and on removal fail to damage any sort of underlying surface. Being highly resistive, yet adhesive binding is strong at attachment points but releases nicely with quick heat and minor cleaning agents treated.
By using the proper techniques, one can keep their belongings looking their best; this makes vinyl stickers favorites for those who enjoy decoration without committing to permanent designs.
When to Replace or Reuse Stickers
A lot of vinyl custom stickers are re-useable, but only if their removal is carefully done. If putting them on wax paper will temporarily store them out of the way. A better option would be replacement if the adhesive is worn or otherwise compromised in some way.
Allow your stickers to be clean and dry when putting them back in storage. Dust and dirt make them lose a lot of their stickiness, and are therefore difficult to work with should one want to use them again.
Creative Ways to Reuse Old Stickers
If you have stickers that can’t be reused as is, try repurposing them: Scrapbook these: Glue them into a memory book.
- Art Projects: Using them in some handmade projects and collages.
- Storage Labels: These are used for labeling boxes or containers.
- Recycling old stickers is a fun way to give them a second life and reduce waste.
Conclusion
Removing vinyl stickers without damage can be achieved if you follow these steps: heating first then peeling off with great caution, cleaning up the remnants with your tool. By being gentle and patient, you will be able to preserve your surfaces absolutely fine for new stickers that will replace them!
Whether it’s updating your car decals or redecorating your room, remember these tips for safe and easy sticker removal. Vinyl stickers are an excellent way to personalize your things, and with the right care, both your stickers and surfaces can remain in great shape for years to come.


