


![5 Best CFD Brokers for Beginners [UK, 2026]](https://todaynews.co.uk/wp-content/uploads/2026/03/Invest-360x180.jpg)


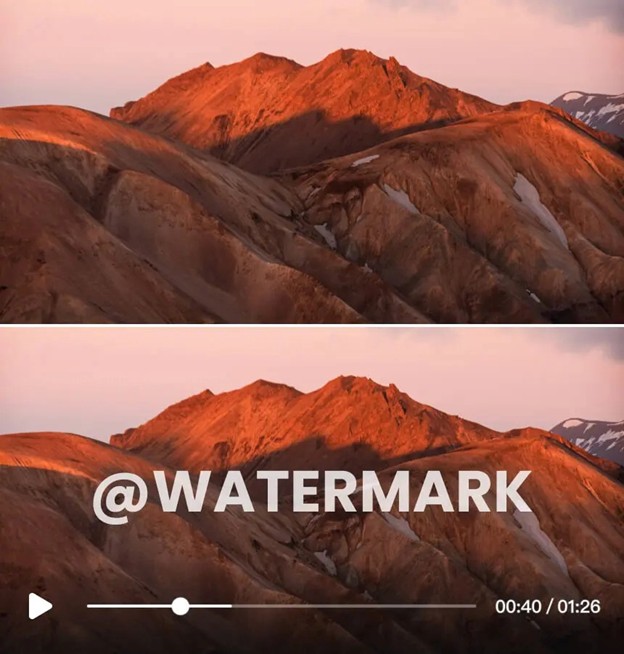
OpenAI’s Sora 2 is creating some of the most stunning and realistic video clips we’ve ever seen from an AI. It’s a powerful tool for filmmakers, marketers, and creative professionals. There’s just one problem: the clips often come with a distracting, multi-layered watermark that can make them look unprofessional in a portfolio.
If you want to showcase your ability to generate creative concepts and direct AI, that watermark has to go. Cropping or blurring it just won’t work, as it often moves and covers important parts of the frame. This guide will walk you through the proper way to remove Sora 2 watermarks, leaving you with a clean clip ready for your professional reel.


Understanding Sora’s Complex Watermark
The watermark on Sora 2 videos isn’t a simple, static logo in the corner. It’s designed to be difficult to remove with traditional methods. It is often semi-transparent and may drift across the screen, making it a moving target. This dynamic nature means that a simple blur or a black box will just follow it around, creating an even bigger distraction.
Trying to crop the video is also a poor solution. This alters the original composition and aspect ratio that you so carefully crafted with your prompt. To maintain the professional quality of your work, you need a method that can intelligently reconstruct the video frames behind the watermark, as if it were never there.
Step-by-Step Guide to Removing Sora Watermarks
Getting a clean result requires the right approach and the right tools. Using an AI-powered solution is the most effective way to handle the complex watermarks from Sora.
Step 1: Prepare Your Sora 2 Video Clip
Before you start the removal process, make sure your source file is as good as it can be. Always export or download your Sora 2 clip in the highest resolution available. A higher-quality source video gives an AI tool more data to work with, which results in a much cleaner and more accurate final product. If your clip is long, consider trimming it down to only the section you plan to use. This will significantly speed up the processing time.
Step 2: Upload Your Clip to a Removal Tool
The next step is to use a specialized tool designed for this task. You’ll need an application that can handle video formats and is built to remove dynamic watermarks. A dedicated online Video Watermark Remover is an excellent choice because it uses advanced algorithms to analyze the video frames. Simply navigate to the website and look for the option to upload your video file. Most tools support common formats like MP4, MOV, and AVI.
Step 3: Identify the Watermark Area
Once your video is uploaded, you’ll need to tell the tool what to remove. Most applications provide a selection box that you can drag and resize to cover the watermark. Since the Sora watermark moves, you need a tool that can track this motion. An advanced Sora Watermark Remover is often programmed to recognize the specific patterns and movements of this watermark, simplifying the process. Ensure the selection box covers the entire area where the watermark appears throughout the clip.
Step 4: Initiate the AI Removal Process
After you’ve selected the watermark, it’s time to let the AI do its work. When you start the process, the tool analyzes the pixels surrounding the watermark on a frame-by-frame basis. It then uses this information to intelligently reconstruct the background, effectively “inpainting” the area to make it look as if the watermark was never there. This process can take a few minutes, depending on the length of your video and the server load of the online tool.
Step 5: Preview and Download Your Clean Video
Once the processing is complete, you will be presented with a preview of the final video. This is a critical step. Play the video and carefully inspect the area where the watermark used to be. Look for any strange artifacts, blurring, or inconsistencies. If everything looks good, you can download the clean video file. You now have a professional-quality clip ready to be added to your portfolio or demo reel.
Tips & Best Practices for a Flawless Result
Following the steps is a great start, but a few extra tips can help you get an even better outcome.
* Always Start with High Resolution: We can’t stress this enough. A 4K or 1080p source file will always yield a better result than a 720p or compressed file. The more detail the AI has, the more seamlessly it can fill in the gaps.
* Process in Shorter Segments: If you have a long video or the watermark’s movement is particularly complex, consider splitting the video into shorter segments. Process each one individually. This can sometimes lead to a more accurate removal, as the AI has a smaller, more focused area to analyze.
* Check for Multiple Watermarks: Some AI generators might place more than one watermark on the video, or the watermark might change positions. Review your entire clip to ensure you have identified and selected every instance of the watermark for removal.
* Understand AI Limitations: While modern AI is incredibly powerful, it’s not perfect. In scenes with very fast motion or extremely detailed, non-repeating patterns behind the watermark, you may notice minor imperfections. The key is to aim for a result that is unnoticeable to the average viewer.
Common Mistakes to Avoid
Many people take shortcuts that ultimately hurt the quality of their final video. Here are some common mistakes you should avoid.
| Mistake | Why It’s Bad | The Better Way |
| Cropping the Video | Ruins the original framing and aspect ratio. It’s a clear sign of unprofessional editing. | Use an AI removal tool that preserves the original dimensions of the video. |
| Using a Simple Blur | The blurred area is just as distracting as the watermark itself and looks very amateurish. | A proper removal tool reconstructs the background pixels for a seamless look. |
| Using Low-Quality Files | Results in a muddy, artifact-filled final video. The AI has too little data to work with. | Always start with the highest quality source file you can get from Sora 2. |
| Not Previewing the Result | You might miss small glitches or artifacts that will be obvious in your final portfolio. | Carefully review the entire processed clip frame by frame before you download and use it. |
Legal and Ethical Considerations
Before you remove any watermarks, it’s important to think about the ethics involved. You should always review the terms of service for any AI tool you use, including Sora 2. Generally, using AI-generated clips in a portfolio to showcase your skills in prompt engineering or creative direction is acceptable.
However, it’s a good practice to be transparent. In your portfolio description, you can add a simple credit like, “AI-generated visuals created with OpenAI’s Sora.” This shows honesty and gives credit to the underlying technology. Avoid passing off the work as entirely your own creation without acknowledging the tool you used.
Conclusion
Sora 2 offers incredible creative potential, and a watermark shouldn’t stop you from showcasing your work. By moving beyond outdated methods like cropping or blurring, you can produce a truly professional result. Using a dedicated, AI-powered video watermark remover is the best way to clean up your clips while preserving their original quality and composition.
By following the steps in this guide, you can confidently prepare your AI-generated videos for any professional setting. Take your time, use high-quality source files, and review your results carefully. Your creative portfolio will be stronger for it.ā