


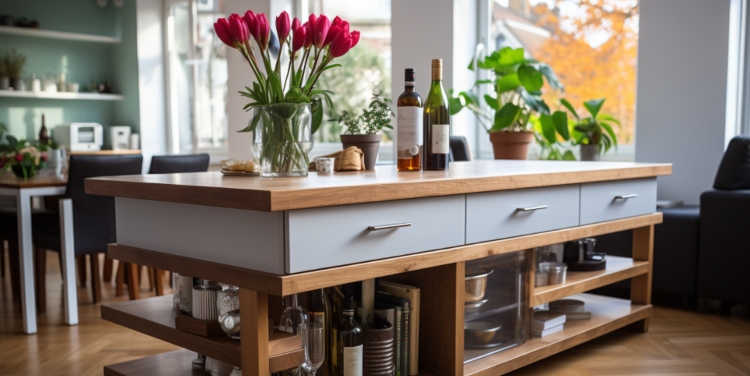
The kitchen is the heart of every home, and having a functional and aesthetically pleasing kitchen island can transform the space into a hub of activity and social gatherings. If you’re looking for a budget-friendly yet stylish solution, making a kitchen island from Medium-Density Fiberboard (MDF) is an excellent option. In this DIY guide, we will walk you through the step-by-step process of creating a stunning kitchen island using MDF, adding a touch of elegance and functionality to your culinary space.
Step 1: Gather Materials and Tools
Before diving into the project, gather all the necessary materials and tools. For a standard kitchen island, you will need:


Materials:
- 3/4-inch thick MDF sheets
- 1×4-inch MDF boards
- Wood glue
- Wood filler
- Sandpaper (medium and fine grit)
- Primer
- Paint of your choice
- Cabinet handles or knobs
- Screws
Tools:
- Circular saw or jigsaw
- Tape measure
- Carpenter’s square
- Clamps
- Drill
- Screwdriver
- Paintbrush or roller
Step 2: Measure and Plan
Measure the available space in your kitchen to determine the size of the kitchen island. A standard kitchen island is around 36 inches in height and 24-30 inches in width, but you can customize the dimensions to suit your needs. Sketch a design plan, noting the dimensions, as well as the placement of any shelves or cabinets you wish to include.
Step 3: Cut the MDF Panels
Let’s start MDF cutting. Using a circular saw or jigsaw, cut the MDF sheets according to your design plan. Ensure precise measurements and straight cuts for a professional-looking finish. Cut the top surface, sides, and any shelves or panels you need for the island.
Step 4: Assemble the Island Frame
Construct the frame of the kitchen island using 1×4-inch MDF boards. Use wood glue and clamps to secure the pieces together, and reinforce the joints with screws for added stability. Check for squareness using a carpenter’s square to ensure the island is not skewed.
Step 5: Attach Panels and Shelves
Attach the pre-cut MDF panels to the frame using wood glue and screws. Start with the bottom shelf and work your way up to the sides and the top surface. Use clamps to hold the pieces in place while the glue dries.
Step 6: Sand and Fill Imperfections
Once the structure is assembled, sand the entire kitchen island with medium grit sandpaper to smoothen any rough edges or surfaces. Fill any gaps, seams, or imperfections with wood filler, and sand again with fine-grit sandpaper for a seamless finish.
Step 7: Prime and Paint
Apply a coat of primer to the entire kitchen island to ensure that the paint adheres evenly. After the primer dries, paint the island with the color of your choice. Consider using paint that is specifically designed for MDF to achieve a long-lasting and durable finish. For a flawless finish, employ expert MDF spraying services to apply a smooth and even coat of paint.
Step 8: Install Handles or Knobs
Drill holes for the cabinet handles or knobs on the doors and drawers. Secure the handles in place using screws, and make any necessary adjustments to ensure they are aligned correctly.
Step 9: Final Touches
Inspect the kitchen island for any touch-ups or adjustments that may be needed. Once you’re satisfied with the result, let the paint dry completely before placing the island in your kitchen.
Creating a kitchen island from MDF is a rewarding DIY project that allows you to add functionality and style to your kitchen without breaking the bank. By following this step-by-step guide, you can craft a stunning kitchen island that fits your space and meets your specific requirements. Embrace your creativity, and soon you’ll be enjoying the benefits of a custom-made kitchen island that elevates your culinary experience to new heights.
David Prior
David Prior is the editor of Today News, responsible for the overall editorial strategy. He is an NCTJ-qualified journalist with over 20 years’ experience, and is also editor of the award-winning hyperlocal news title Altrincham Today. His LinkedIn profile is here.