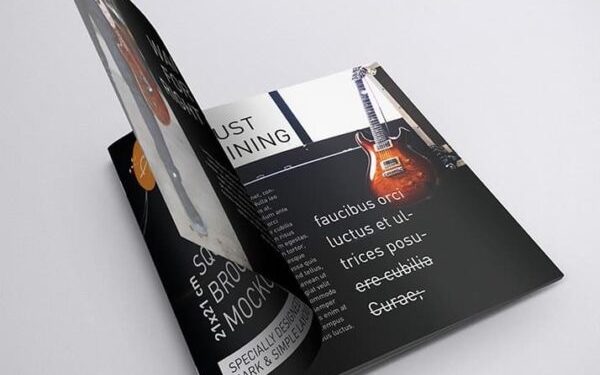
Figuring out how to arrange pages for booklet printing can be somehow daunting at first. Sometimes, it can appear like a very difficult mathematical calculation in the University.
However, with the step-by-step guidelines provided in this article, the process should be as simple as possible. So, take a moment to carefully digest the information in the subsequent sections below.
Guidelines for Arranging Pages for Booklet Printing
From the point of creating your booklet to arranging and printing, ensure to follow the steps provided below in this section.
Ascertain the number of pages of the booklet
Firstly, during the ideation stage, ensure to decide on the proposed number of pages you want before creating your booklet.
The page count will definitely influence the booklet size, content volume, and binding method to be used. Generally, the booklet sheets are designed to have four pages each.
Carefully arrange the booklet pages for printing
Arranging the booklet pages will be determined by the binding style you intend to use. For instance, if you’re using the saddle stitch method, the first and last booklet pages will contain the front and back cover designs.
Then, the second page from the front, connecting to the second-to-the-last page, is usually meant for copyright information and disclaimer. Meanwhile, the center spread of the booklet will be the centermost pages.
Furthermore, ensure to arrange the pages in consecutive order and place the pages in pairs. For example, if you’re creating a small booklet, page 2 on the booklet should be next to page 15, page 4 should be next to 13, page 6 should be next to 11, etc., until you cover all the pages in the booklet. You can also utilize a software program like Adobe Acrobat, which has a booklet printing feature.
Re-check the booklet page layout
As you gradually approach the printing stage, ensure to perform a thorough check on your booklet’s page numbering, crop marks, margins, bleed, as well as alignment. You may want to ensure that the numbers are either placed at the top or bottom corners of the booklet close to the outer edges.
Also, be sure to maintain consistent margins that are large enough, which helps to protect your texts and other vital information from being cut off. Then, increase the margin around the binding edge where the staples will be applied across the fold line.
In addition, carefully align and adjust the texts and images to avoid having them run across two pages or the fold line. Don’t forget to create extra space for bleeding and ensure that the crop marks are set where you’ll cut the pages after printing.
Create a print-ready PDF
The most ideal file type to use when preparing your booklet for printing is a print-ready PDF, which helps to maintain the layout and quality you’ve created. Ensure to maintain CMYK format and 300dpi resolution for the finished booklet whether it is individual booklet pages or printer spread.
Adobe programs appear to be the best software for print materials. However, ensure to leverage the most suitable software for your booklet printing.
Submit the booklet file to the printer
The moment you’re okay with your booklet design, page arrangement, print settings, and final file preparation, ensure to submit the file to a professional printing center like HelloPrint for the final printout.
Also, ensure to inform the printing company about your preferred paper type, size, binding method, as well as the total number of booklets you need. Additionally, it’s important to get one booklet printed out first as a sample before completing the other booklet printout.
Page Count and Binding Style
Saddle stitch seems to be the most common binding type when choosing your booklet’s page count. However, there are a couple of others explained below in this section.
Saddle Stitching
The saddle stitching method is when every single sheet of the booklet paper is folded in half with one side facing the other. Thereafter, wire staples are used to stitch them together across the fold line.
The saddle stitch binding style requires that the booklet page count should be in an incremental order of four. When using this binding method, your booklet should have a minimum of 8 pages and a maximum of 92 pages for the best output. The saddle stitch method is common in comic books, brochures, and magazines.
Spiral binding
The spiral binding method is when every single sheet of the booklet is printed on both sides and cut down carefully to the ideal trim size. Thereafter, they’re collated in the organized page number order. Then, the binding edge is punched to create holes where the spiral coil will pass through.
With the spiral binding method, you need a minimum of 8 pages with a maximum of about 2 ¾ inches thickness. Again, the pages of the booklet papers should be in incremental order of two.
Kindly avoid printing on the spine of the papers because of the holes that will be punched into them. Examples of books that utilize this method include school projects, jotters, and book souvenirs.
Perfect binding
The perfect binding method is when single sheets of booklet paper are printed on both sides. Thereafter, they’re collated one after the other in sequential page number order. In this binding method, the sheets of paper are carefully cut down to the perfect trim size. After that, the edges of the papers are ground down.
When using perfect binding, ensure to work with a 28-page minimum with about 2 inches thickness. Also, the page count should be in incremental order of two. Perfect binding style is mostly used for textbooks, journals, and novels.
Wire-O binding
Again, in the wire-o binding method, you need to print on both sides of each sheet of paper, cut them down to the ideal trim size, and collate them in an organized page number order. Then, the binding edges of the papers are punched to create holes.
Thereafter, a professionally designed metal wire is passed through the holes to bind the booklet together. When using this method, you need a minimum of 88 pages and a maximum of about 1 ¼ inches thickness.
The pages are expected to be in incremental order of two. Also, you must avoid printing on the edges of the papers because of the holes that will be created for the binding. Examples of books that use the wire-o binding are maintenance manuals, cookbooks, and reports.
Final Words
Arranging your booklet for printing can be a seamless exercise when you understand the ropes around the process. The vital guidelines you need to arrange your booklet pages and prepare them for final printing have been revealed in this article.
So, ensure to study the tips above and apply them as recommended. Lastly, whether you’re working on your school project work, novels, notebooks, journals, or magazines, the step-by-step procedure above will help give perspective to your work process.

